Haybox cooking: how to make a haybox and save energy by Huw Woodman
Posted by Fiona Nevile in Discoveries | 10 comments Huw Woodman from the Bushcraft Magazine has been looking at ways to save energy, by using the old-fashioned haybox!
Mrs Beeton’s famous 19th century cookery book makes reference to a haybox. What’s one of those? It’s a box full of insulating hay that keeps a stew or other hot dish at sufficient heat so that it cooks without having to keep it in the oven or on the stove for hours.
If you think how a conventional stove hot-pot works, you heat the ingredients up to the boil and then you simmer it for a long while whilst it cooks. The pot loses heat through convection and conduction and the stove keeps that replenished. You are pumping energy into the system to keep it hot enough for the ingredients to cook.
If the heat loss from the pot could be kept to a minimum, then the amount of heat that you’d need to put into the system would also be reduced. The haybox works on this simple principle. You heat the pot to boiling and then transfer it to a highly insulated box and the retained heat does the cooking for you.
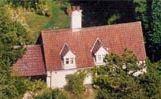
 I decided to give it a try. I found some old marine ply in the garage, 18mm thick, although any sheet material, such as chipboard or MDF would do. I then made a box out of that plywood. Dimensions? It’s not critical. I worked our how deep a casserole dish with a lid on would be, then I added (roughly), the thickness of two pillows, which would act as the top and bottom insulation. I came up with around 35cm deep. In terms of width and depth, the same principle applied. I made the box about 40 cms square, to allow for the dish plus some insulation (see picture).
I was going to make a rough frame to hold the box together, but I found with the ply that I could screw the box together without needing a frame. There’s no hard and fast rule though!
For a lid, I used the ply again and screwed a couple of bits of wood inside the lid so that they would help seat the top and prevent it from slipping about (see picture).
 The box needed a couple of handles and the top also needed a handle, so in the best traditions of saving the planet and using materials that I already had about the place, I used some old electric flex knotted on the inside of the box and passed through some drilled holes – easy!
Now for the cooking and over to Fay, who looks after the administration on the magazine. She’s also a great cook!!
She used some brisket beef – not a great cut, but I was going to make jerky with any left-overs and brisket works well for jerky!
Fay used normal stew ingredients (beef, root vegetables, water and seasoning) and made it up in a hot-pot on the stove. She measured the temperature when it came to the boil – 95 degrees Celsius.
Then into the haybox, with the casserole dish (with its lid on), sitting on top of one of the pillows. She decide to use two old jumpers rather than hay for the side insulation, on the grounds that it might be difficult for some people to get hay easily, and she wrapped these around the pot.
The second pillow went on top and then she put the top on the haybox.
After an hour, she tested the temperature of the stew. It was 75 degrees, but then the heat loss slowed right down and after 4 hours, the temperature was still 65 degrees.
It tasted good. The beef was cooked and the vegetables (potatoes, carrots, swede and turnips) were also cooked. Fay’s not easily impressed, but she was surprised at how well it worked.
So the haybox has become part of my life, along with the Mongolian hotpot and the griddle! It’s a cosy item, that sits well in the house. You could even put a cushion on top and use it as a stool when not in use!
Huw Woodman is the consultant editor of the Bushcraft magazine: http://www.bushcraft-magazine.co.uk/.
The Bushcraft magazine aims to re-connect people to the landscape and older, sometimes forgotten knowledge.
Leave a reply


I have been using kitchen towels and rapping the pot this has worked well, but made the box; Boy is it good used rock-wool and covered it with an old sheet to keep the wool in place, covered the lid same way. thank saving us £££££££££££ and much tidier
I have to say that using existing materials isn’t bad (MDF in garage), but why not instead use a cardboard box that has served its purpose?
Many kitchen appliances, computers and other valuable appliances come in sturdy corrugated boxes that insulate far better than MDF or similar because they trap air inside their walls.
The rest is great!
Good pont Greg. We bought a huge 5 litre ancient Thermos at the village fete this year and find that it’s grest for slow cooking too.
Hi Keith
I found this useful article that might interest you
http://www.selfsufficientish.com/hayboxcooker.htm
I wonder if this straw box cooker could be made using modern house insulation materials like fibreglass or even left over bits of 2 or 3 inch thick wall insulation boards like those faced with foil
Hi Scoop
My mum used a wide necked thermos to cook meals during the three day week/power cuts in the late 1970s. It worked.
Cobb have just bought out a modern hay box. Looking at it makes me wonder if I could use a large thermos type flask to hold the contents.
Hi Rach
I totally agree. Any cooking method that saves time and energy has to be a double winner. Thanks for dropping by.
Hi nÃ
These are great tips! Thank you so much. They are thoughtful and thought provoking. Use less fuel, less carbon emissions and cut your energy bills. Perfect!
that sounds ace! i like the idea and must give it a go! i looked for the bushcraft magazine whilst i was in the uk last christmas, but didn’t find it. will try directly on their website i think. thanks.
in the summer we do a similar thing to make our bread rise – once we’ve kneeded it and made it into bread shape, it needs to stand for two hours in a warm place, so we cover it with a wet tea towel, put it in a big storage box on the front lawn with a sheet of glass on top, and it rises amazingly! takes less than the usual two hours too!
recently we’ve also tried putting out a big black bucket of water on the lawn with aforementioned thick sheet of glass on top, to warm up in the sun for washing the dishes – works wonders and there’s no need to use your boiler!
Great post, really interesting!